How to Change Violin Strings
How can I change my violin strings?
Fitting your new strings
Modern strings rarely break if correctly fitted to a violin in good condition. The following notes will help you to get the best life from your new strings.
- Uncoil strings carefully to avoid twisting or kinking. Pull the string gently through thumb and index finger to check for any irregularity.
- Check your bridge and top nut for sharp edges. The grooves should not be deeper than half the diameter of the string and no wider than the string.
- Apply graphite in the form of soft pencil lead, 2B or 3B, liberally to the grooves in bridge and top nut.
- It is inadvisable to use single fine tuners for the lower 3 strings. These fine tuners are designed for E strings only, the slots are too narrow for the thicker bindings and can cause premature failure. If you require 4 tuners, you can use a tailpiece with 4 integrated tuners which have wide slots designed for the lower 3 strings.
- Please do not use fine tuners for gut cored strings. These strings are not designed for use in fine tuners and can be damaged by them.
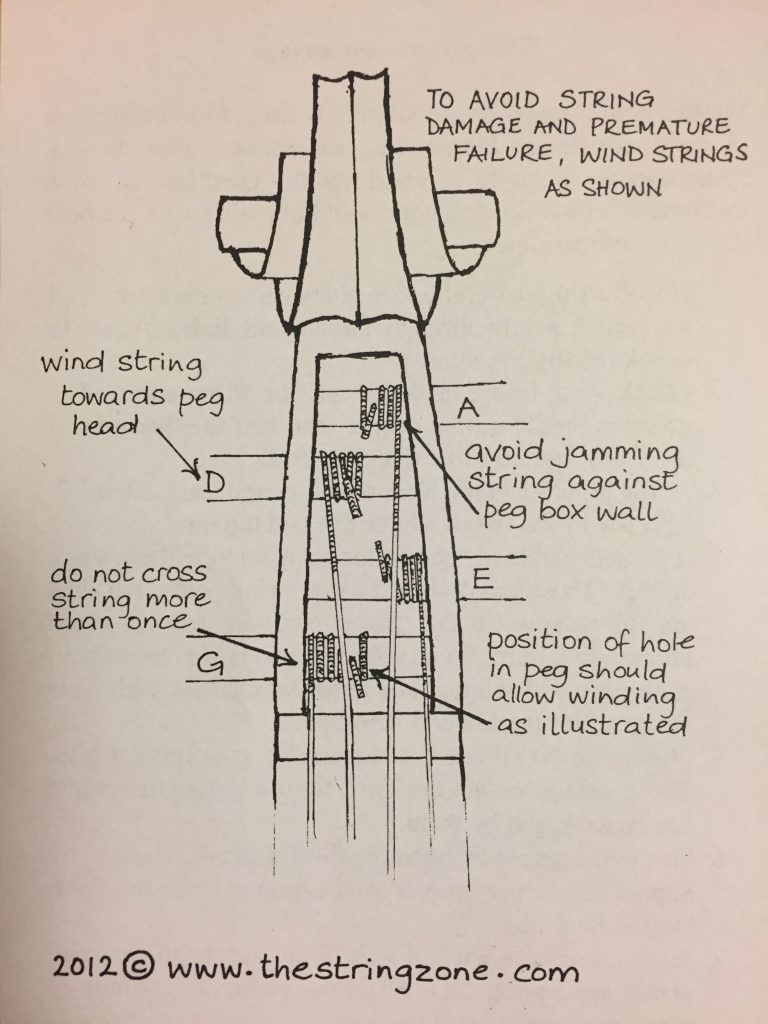
- Fit the strings referring to the illustration below.
- Support the strings away from the groove in the nut for as long as possible.
- Tune a semitone flat and wait 10 minutes or so, then pull gently up to pitch. Do not tune sharp, always tune up to the note to maintain tension.
